Non-destructive Inspections: Phased Array Ultrasonic Method
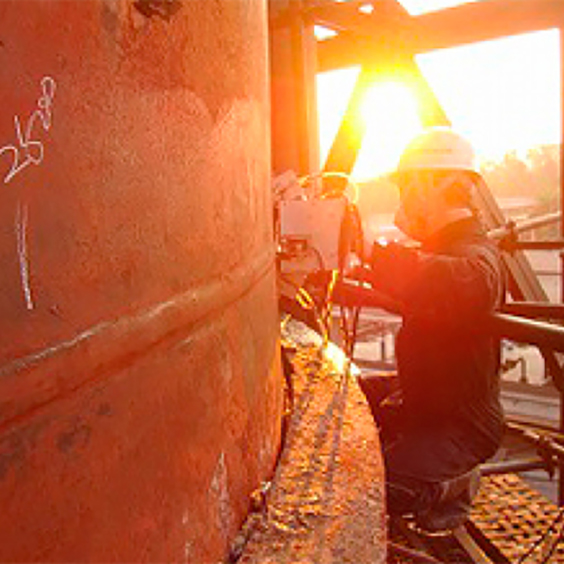
High-level visual diagnosis to provide more visible and more accurate inspection services
This technology is an improvement on the pulse-echo method of ultrasonic flaw detection and sizing capacity.
This technology is an improvement on the pulse-echo method of ultrasonic flaw detection. The method entails the use of probes with numerous arrays of microscopic transducers, which emit ultrasonic beams in a specific direction and are focused at an arbitrary depth of the test subject to improve flaw detection and sizing capacity. This technology makes it possible to obtain highly accurate inspection results in comparison with conventional ultrasonic flaw detection. The improvements are in terms of the identification of object shapes or flaw echoes, as well as flaw sizes (lengths and heights), as evaluations are conducted with scanned images and damage conditions are easier to imagine intuitively.
Features
The following applications that use the phased array ultrasonic method are being developed for users in fields as diverse as steel production, machinery, petroleum, and chemical plants, both in Japan and in other countries.
- 1Ultrasonic beams can be focused at an arbitrary depth
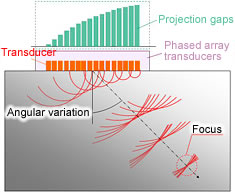
Basic concept of phased array Ultrasonic beams can be focused to an arbitrary depth by controlling the transmission timing of each transducer, arranged in a linear form. Adding delay time for each transducer to the signal received by each transducer makes it possible to raise the directivity of wave reception from any arbitrary position.
- 2Electronic scanning of ultrasonic beam is possible
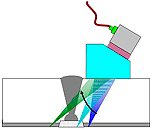
Electronic scanning of ultrasonic beam Electronic scans can be performed with transducers, but without any mechanical scanning sweeps, by electronically controlling the transmission and reception angles, as well as the focus distance of the ultrasonic wave.
- 3Weld line inspection
When inspecting a weld line, by running electronic scans in an orthogonal direction with respect to the weld line and manually scanning with transducers in parallel with the weld line, users can digitize and upload waveforms for the segment equal to (pitch of electronic scan) × (pitch of scan in X-axis direction) to the system. The recorded waveform data can be processed to obtain scan images of an arbitrary cross section or projection (B-Scope, C-Scope, or D-Scope), so that flaw echoes and shape echo coordinates can be read directly.
- 4Materials with significant attenuation
The technology can be applied even to sections where it has been difficult to perform inspections due to the attenuation of the ultrasonic beam with conventional ultrasonic flaw detection methods, such as welding sections of austenite stainless piping or large cast items, such as press components.
- 5Deep surface flaws
The technology enables inspection of corrosion thinning for pressure vessels or steel structures. Also possible are inspections for flaws, such as hydrogen-induced cracking (HIC) resulting in parallel cracks in the metal rolling direction caused by the coagulation of hydrogen molecules on the boundaries of uneven structures, such as intruding objects. Scan data for the overall area within a specified range can be recorded and evaluated in a short time.
Case example of hydrogen induced cracking (HIC) detection
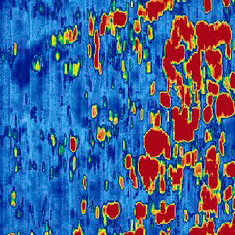
Flaw distribution diagram; 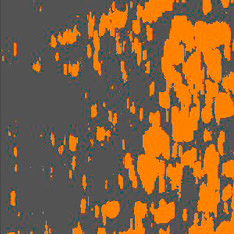
Two-tone graduated image with only flaw section enhanced - 6Shaft inspection
Shafts of reduction gears on cranes or the wheel shafts of trains, as well as drive train shafts that are used in large quantities in facilities at manufacturing plants, are periodically overhauled due to threat of destruction from fatigue. By implementing the phased array ultrasonic inspection from the ends of the shafts, users can evaluate the soundness of shafts without any disassembly.
- 7Complex shapes
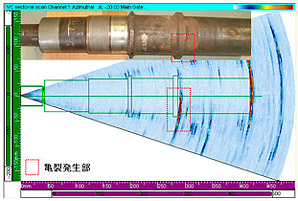
Case example of detecting a crack on a wheel shaft For objects with complex shapes, applying or evaluating with the conventional ultrasonic scanning method has traditionally been difficult. The phased array ultrasonic method can be used to easily identify flaws and shape echoes, as the shape of the cross-sectional area of the object prepared by CAD can be displayed in the software window.
Other inspection items
- General non-destructive inspections
- Investigative diagnostic services for steel structures
- Inspections, trial operations and performance verification tests
- Stress measurements
- Analysis services
- 3D laser measurement/cork drum deformation
Cork drums repeat the cycle of high temperature (440-500 degrees) and pressurization and the cycle of room temperature and atmospheric pressure every 14-24 hours. They cause deformation called pulsing on the body of the main unit due to the thermal stress. The deformation volume increases as the number of times of operation gets higher, and thus it attracts significant attention from users. The results obtained from the measurement are considered to be important information in determining whether to repair or replace the main unit.
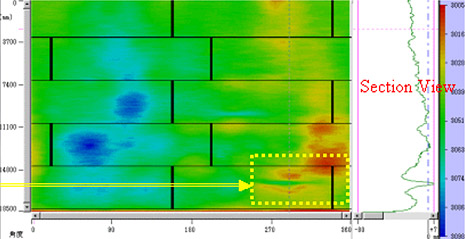
Display of deformation lines in the contour figure 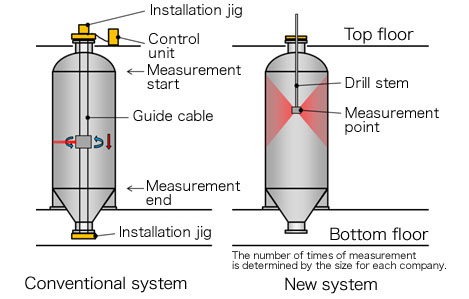
Left: Conventional system/Right: New system
- 3D laser measurement/Coke oven
It is possible to manage the absolute coordinates of the shape data of the coke oven, and to keep track of the position of facilities and changes in the shape.

- 3D laser measurement/measurement and damage monitoring of various plant equipment
- 1Measurement of the corrosion thinning volume of the container in which excessive thinning occurs, and evaluation of the remaining life by calculating the corrosion speed
- 2Measurement and observation of the deformation and corrosion volumes of bricks of the containers made of refractory bricks inside
- 3Measurement and observation of bending of the heating furnace tubes
- 4Measurement of the deformation volume (convexes and concaves) of the storage tank side boards
For detailed information about the products please contact
Phone
SHI-ATEX Co., Ltd.
Web
SHI-ATEX Co., Ltd.

